If you are using Magic Mouse with UI Kit then here are some tips and tricks to get started.
UI Kit gives you a lot of control over adding classes etc which means that you can manually add the required classes very easily (if you wish to do so). Remember the class names that we need to add to trigger any hover effects are: magic-hover magic-hover__square.
Navigation
RW Menu
If you are using the RW Navigation element then you will not be able to add the required classes manually (as these links are generated by RW). For this menu type you should use either of the inbuilt child stacks for Navigation - e.g.:

Other navigation types
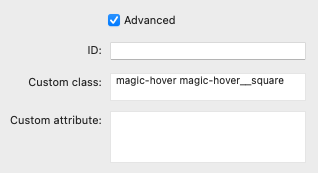
For other UI Nav bars, if you are manually adding the elements / links then you have the ability to add the required classes to each link that you wish to display any hover effect. Simply activate the 'Advanced' options and paste in the required class names for each menu item:
 Note: The hand-built UI Kit menus will also work with the approach described for the RW Menu above (if you prefer to use that automated approach).
Buttons and links (and other elements)
Like with the Menu Items above, the F6 button / link stacks (and most other stacks) allow you to add your own custom classes. For any element that you wish to use the hover effect with you would simply add these same classes to the custom CSS boxes as detailed above.
Alternatively, there is a dedicated UI Kit button child stack if you prefer to automate the activation of all UI Kit buttons on a page.