
Splider offers a lot of power and flexibility and, as such, Splider stack contains a lot of customisation settings. If you are new to Splider this may be a bit overwhelming at first. This quick guide though will take you through the key settings that will have you creating stunning sliders in your projects with just a few clicks!
Step 1: Add a Splider 2 stack to the page

Step 2: Add your content (and as many Splider slides as you need).
For the 'Stacks Slide' type you can simply drop any stack that you wish into it. Whatever you add will become the content of that particular slide. Add as many new slides as you need.
Note that in addition to the regular 'Stacks slide' type, there are dedicated slide types for Images and Video too. The Splider Image slide stack allows you to do some advanced things with images (in relation to lazy loading and sizing) but you can alternatively use a regular Image stack inside a Stacks slide.
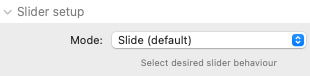
Step 3: Choose your slider type
Splider lets you present your slides either in a regular slider mode or as a carousel (i.e. the slides are repeated in a loop). The default is for Slider but you can select carousel via this stack setting:
Step 4: Select how many slides to show at one time
By default only 1 slide is shown at a time but (especially on larger screens) you will likely want to display more than 1. To increase the number shown use this stack setting:
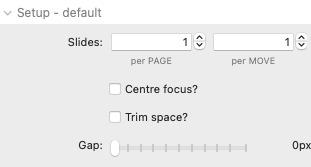
You can see here a setting for 'per Move' - this setting tells the slider how many slides to advance by with each click of the navigation arrows. If you want all visible slides to be changed with each click of the arrow then make this number the same as your per Page value.
If showing more than 1 slide at a time you will likely want to add some spacing between them. That is where the Gap setting comes in! The Centre focus and Trim space settings adjust where the 'active' slide is displayed - experiment with these in Preview mode to see the difference that they make.
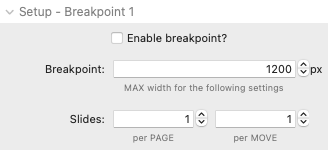
Step 5: Adjust (if required) for additional breakpoints
The values that you select in Step 4 will by default apply to all device sizes. On smaller screens though you will likely want to adjust the amount of slides shown (as typically on mobile screens you would only have space for 1 slide to be shown at a time). To enable a breakpoint click on this 'Enable breakpoint' setting, select the desired breakpoint and adjust the slide numbers as required. You can do this for a second (smaller) breakpoint if required.
Step 6: Show / Hide the navigation options
By default new Splider stacks added to the page are set to display Pagination dots and navigation arrows. You can disable either of those here.
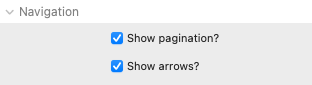
Tip: If you want to style how these navigation elements look then you can add one of the available styling stacks and customise the style as you wish!
And that is all you really need to know to get you started. Once you have a good understanding of this then be sure to check out all of the other Splider settings to see how you can begin to take your sliders to the next level!