
Squiggler offers 2 distinct modes of operation, 'Divider' and 'Underliner'. Divider mode can be used to seperate blocks of content whereas Underliner mode is used to add a squiggle under some text.
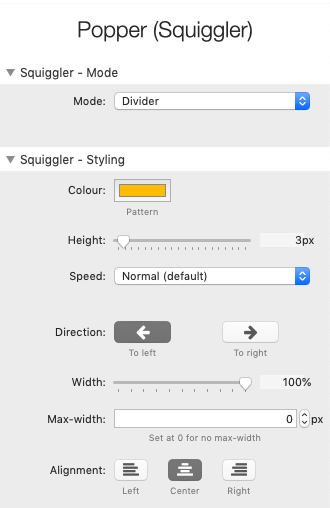
Squiggler - Styling
The styling options are available for both use cases.
Colour
The colour of the squiggle. This can have an opacity value.
Height:
The height of the squiggle. Default is 3px.
Speed
You can choose from 5 different speeds. Note: The bigger the squiggler height the faster it will appear to move.
Direction
You can set the squiggle to move to either the left or to the right.
The following settings only apply to Divider mode, or Underliner mode when targetting Horizontal spans.
Width
This sets the width of the divder line (in %).
Max-width
You can also set a maximum width (in px) if you want to limit how wide a squiggle line can be. (NB: Leave at 0 for no limit!) Alignment: If using a width of less than 100% you can align the divider line to the left, centre or right.
Squiggler - Underliner mode
Squiggler Underliner mode comes with additional settings that let you target what text you want to add the squiggle to.
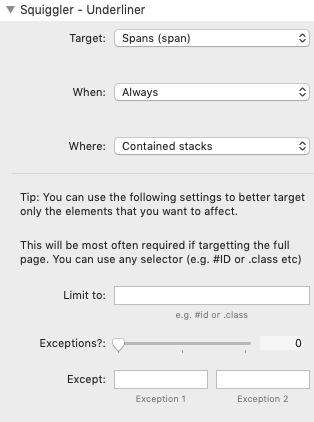
Target
Specify what text you are wanting to target. This is done by specifying a particular html element. The options are:
- Span
- Italic text
- Bold text
- Horizontal rules
- Links
'Span' is the most flexible option as you simply need to add span tags around whatever text you want to target. This can be done in any text/markdown stack. It would look like the following:
<span>Here is the text where I want my squiggle!</span>
When
You can choose for the squiggle to be shown at all times or only when that text element is hovered over.
Where
The default option is for Popper (Squiggler) to only add the squiggle to any targetted content that appears in stacks that have been dropped into that Popper stack.
It is possible though to target the whole page (however this is more advanced as will often need you to add some limits/exceptions to ensure that undesired elements are not targetted - see below).
In both 'contained stacks' and 'page' scopes, there is the ability to fine tune what elements you want to target, to ensure that squiggles do not appear where you don't want them to. This will most often be required when (for example) targetting links as you are unlikely to want the squiggle to appear in the navigation items. To add these controls / limits you will need to have a basic understanding of using the browser inspector to idenitify ID or class names. (The example project has some more information about this). Using the 'contained stacks' approach is much less likely to require the use of this as you can control what stacks you add into the stack
Limit to
You can add an ID or a class to this box so that only matching elements within a container with the ID or class will be affected.
Exceptions
You can add up to 2 exceptions and the stack requires you to state how many (if any) you are using.
Except:
Add in the ID, class or element that you want to exclude. Note: You need to also add the # for IDs and the . (dot) for classes - e.g. #IDName or .className.