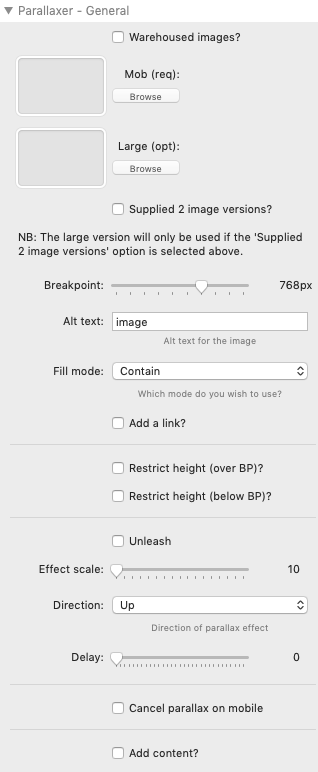
Warehoused images
If you wish to link to remote images as opposed to using local images then check this box. You will then be able to set a url link to your images.
Image
If you are using a local image then drag-and-drop it into the image well. If you are using a warehoused image then add in the link to the image file.
Note: You should use appropriate image sizes for where your images are being placed. For example if you are using a full-width Parallaxer then you would want to use the same kind of size of image that you would use in a Banner etc.
Tip: It can be useful to supply a portrait image for mobile and a landscape image for desktop. If only one image is being supplied then landscape is generally best.
If you have supplied an image for mobile AND large devices then check this box. This ensures that the correct method for supplying multiple images to the browser is used.
Alt Tag
Use this field to enter an Alt Tag for your image.
Note: This is a key advantage that Parallaxer has over other parallax solutions as most (possibly all) of them use background images which are 'decorative' elements and not classed as content.
Fill mode
By default, the fill mode is set to 'Contain'. This means that the full image will be displayed inside whatever container it is placed in. (If a max-height for the container is set then this will over-ride the height of the image)
The other fill mode option is 'Cover'. This option will fill the space though the image will be cropped (on certain devices / screen sizes) to do so. Using 'Cover' is perfect for things like hero banners where you might want the image to fill (for example) 100% of the browser window.
Note: Selecting 'Cover' as the fill mode opens up some additional 'advanced' options. These allow you to override the default sizings and positioning so that the image appears as you want it to. The default options make the image the full size of the browser window (how much of that you can see will still depend on whether the height of the container has been restricted.
If you are limiting the height of the container to (for example) 50vh (which is half the height of the browser window) then you might also want to limit the size of the image to 50vh otherwise only the top 50% of the image will be seen.
Add a link
You can opt to make the whole image a link if you wish. Checking this option lets you add a link to whatever you wish.
Restrict container height
By default, the full image will display and so the height will depend on the width of the container. If you wish to limit the height then check this box.
Max-Height
You can state a max-height that you want the image to appear at. This will crop the picture if the height is greater than the maximum height set.
Note: You can use whatever height/length units you wish. This could be pixels (e.g. 500px) or maybe 50% of the browser window height (e.g. 50vh).
Unleash
The unleash option removes all effect scaling from the image and it appears as it would in any regular image stack. In unleash mode however, the image will move across the screen in the direction set. It also uses the 'Effect scale' setting to control how far/fast it moves.
Note: Unleashed mode works best with images that are set to 'contain' fill mode. However, you can experiment with using any settings.
Effect scale
You can adjust how great the parallax effect is by controlling the 'scale'
Note: A lower value produces a more subtle effect. Larger values create more obvious movement. A value under 30 is recommended for normal parallax effects. You may find higher values useful when using the 'unleashed' mode.
Direction
You can set which direction you want the parallax effect to go in. This can be either up (default), down, left or right.
Note: Using left and right work especially well with images that portray movement.
Delay
You can add a delay value which will cause the image to continue moving slightly after the user has stopped scrolling.
Tip: A value of 10 equates to 1 second of additional movement.
Cancel on mobile
Parallaxer works great on mobile devices but there may be times where you do not wish to use the effect on certain devices. Selecting this option allows you to set a breakpoint under which the effect will not be applied.
NB: Cancelling the effect will still display the contained image as normal.
Add content
You can simply use the image on its own but if you want to add some content over the image then check this box. This will provide a drop-zone where you can add any stack(s) that you wish.
Placement
This setting allows you to determine exactly where on the image the content will appear. This can be any one of 5 zones: Centre (default), top-left, top-right, bottom-left or bottom-right.
Note: You will probably want to keep the extent on the content to a minimum.